Copyright © 2025 UHelp NextJs. Designed with by Spruko All
rights reserved.
Note : Please note that any changes made to the original source code will be lost
after updating to the latest versions.
UHelp - NextJs Support Ticketing System
Admin Dashboard
- Visit the "Admin Dashboard" URL, e.g., https://yoursite.com/admin/ , and login to the admin dashboard using the credentials that you have given while installing the application.
-
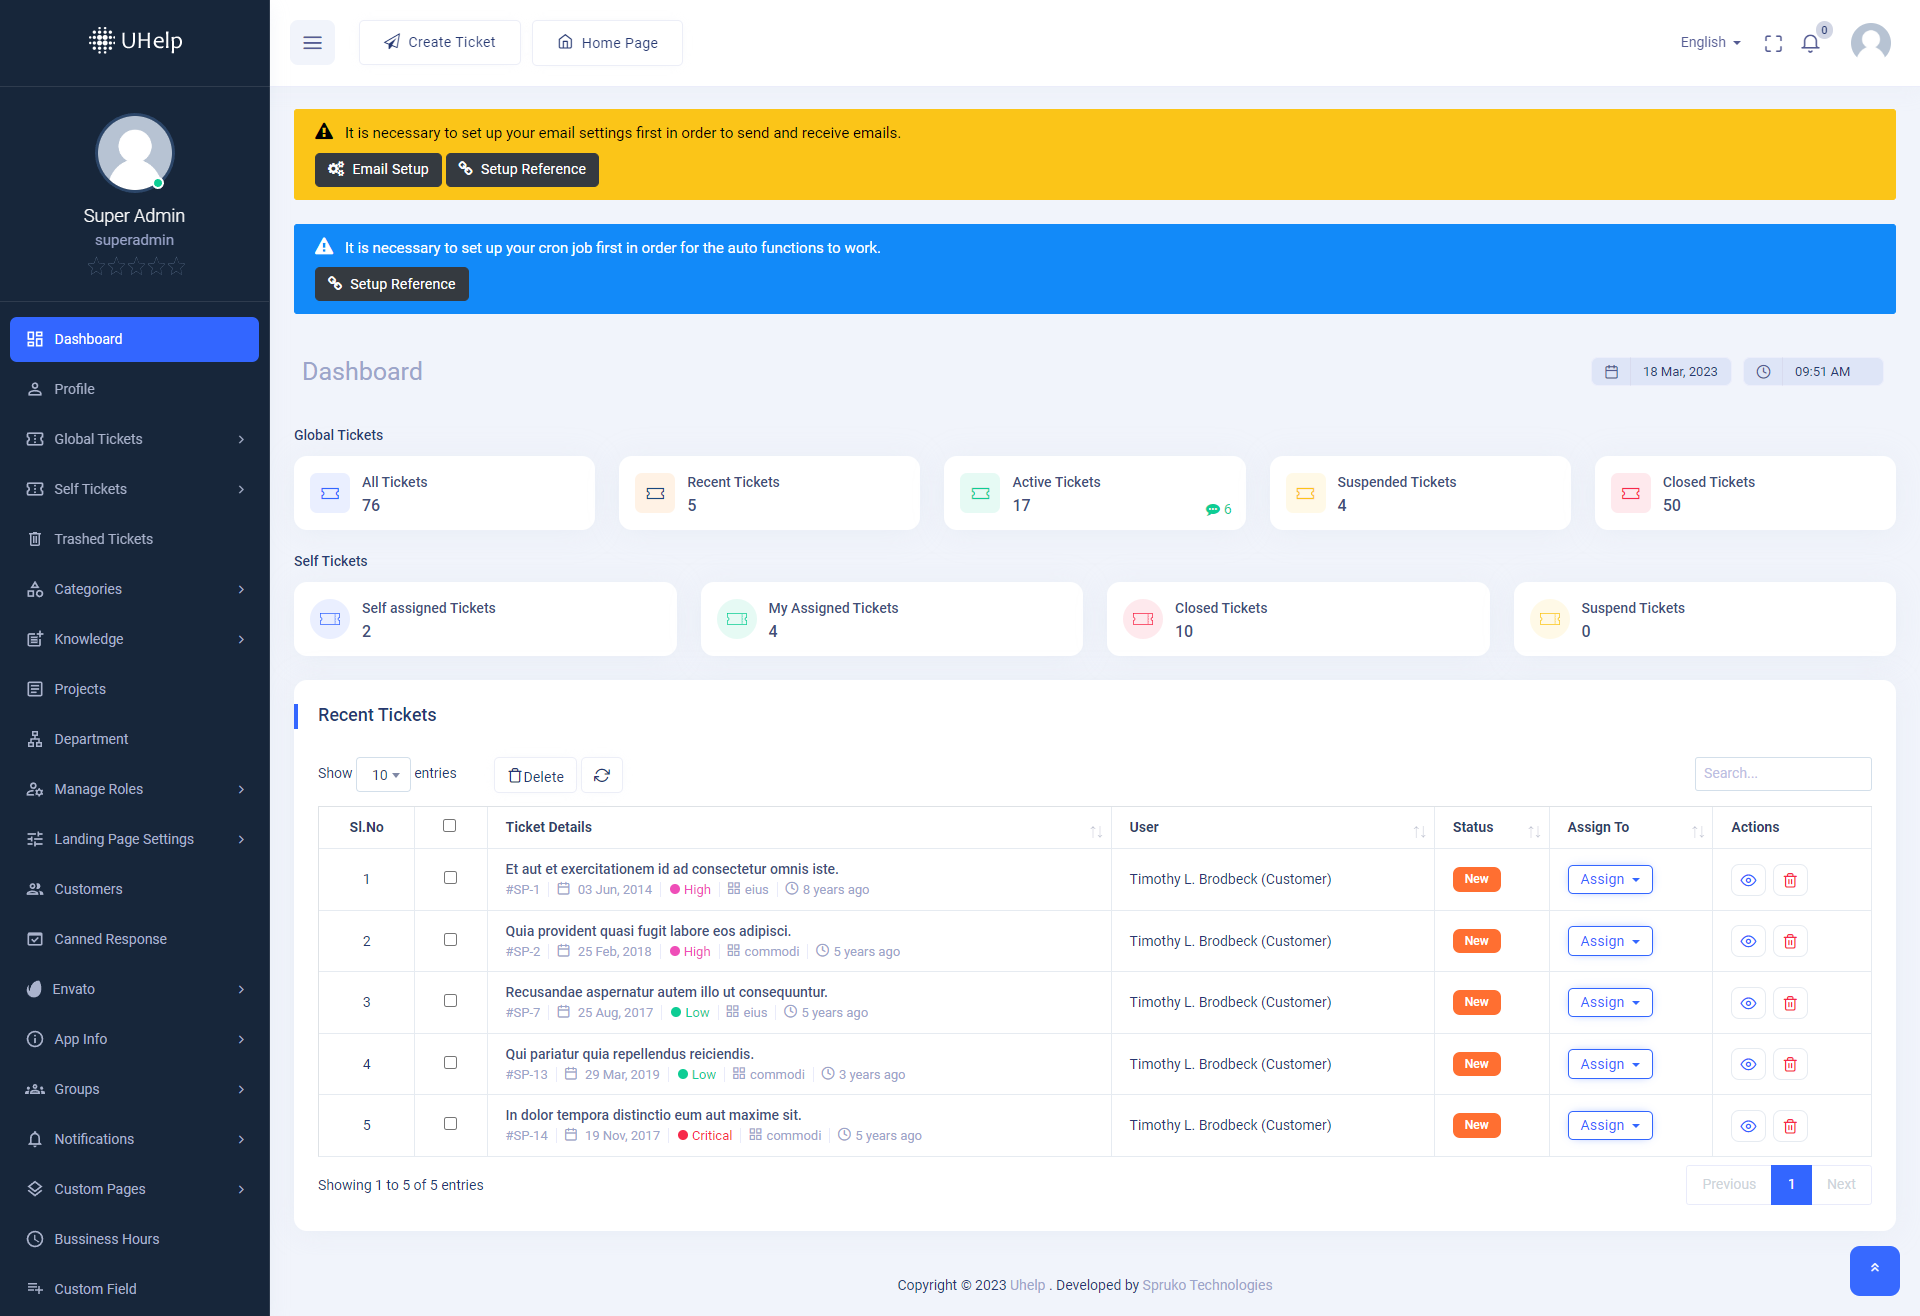
Once you successfully logged in to the "Admin Dashboard", you’ll see two
sections. One is the "Global Tickets" section with five "Ticket Navigation
Blocks" and the other is "Self Tickets"
with four "Ticket Navigation Blocks". Those blocks will navigate you to particular tickets. - The "Recent Tickets" table displays only new tickets. And also, you will find a "Delete" button. Using that delete button, you can delete those tickets.
- A manual refresh button is placed beside the delete button to refresh the "Tickets Summary" table manually. And a search bar to search tickets by typing manually and select 2 dropdown with numbers to see the total ticket count.
- The best part about this dashboard is that you can monitor your "Time and Date" according to your Time Zone and Country.
- In the top left corner of the "Header Section", you’ll see "Create Ticket" and "Home Page" buttons. By clicking on the "Create Ticket" button, you can create a "Guest Ticket" for your "Customer", and those newly created tickets will be in the "Recent Tickets" until they are self-assigned or assigned to another user or replied to.
- And by clicking on "Home Page", you’ll be navigated to the Landing Page of the application, which is the main site (URL), e.g.,https://yoursite.com/.
- In the top right corner of the "Header Section", you’ll be getting a "Switch Language" button, "Full Screen" button, "Notification Bell Icon," and "Profile Avatar."